
If you’re committed to hosting your Next.js application on the scalability and reliability of Amazon Web Services (AWS), you’ve come to the right guide. This in-depth tutorial provides a comprehensive, step-by-step guide to hosting your Next.js application on AWS, with no stone left unturned in a smooth and optimized deployment. From setup and deployment strategies to cutting-edge configurations, security best practices, and performance tuning, we’ll cover it all. Whether you’re Building a Website from scratch or migrating an existing one, this guide will serve as a foundational resource.
Revealing the Potential of AWS for Next.js Hosting
AWS is an optimal hosting option for Next.js apps because of the many compelling features:
- Unprecedented Scalability and Reliability: AWS allows your app to auto-scale dynamically upon real-time need, ensuring impeccable peak performance throughout traffic spikes.
- Global Access at Low Latency: Take advantage of AWS’s large network of data centers that span the entire globe to get your app proxied closer to your users for greatly diminished latency and a greater overall user experience.
- Cost-Optimization with Flexible Pricing: AWS provides varied pricing plans, such as pay-as-you-go, so you can optimize costs based on your application’s individual usage patterns.
- Seamless Integration with AWS Ecosystem: Seamlessly integrate your Next.js application into a wide range of AWS services, such as robust databases (RDS, DynamoDB), elastic storage solutions (S3), sophisticated content delivery networks (CloudFront), and innovative serverless functions (Lambda), to realize the full potential of your application.
- Simplified Administration with Managed Services: AWS offers managed services such as Elastic Beanstalk and Amplify, taking the complexity of infrastructure management away and simplifying deployment, enabling you to concentrate on development. Tools like these complement efficient Project Management Tools, helping teams streamline development workflows and deployments.
Planning Out the Deployment Process
Deploying a Next.js app on AWS requires these essential steps:
- Initial Next.js Application Setup: Creating a simple Next.js app.
- AWS Account Configuration: Creating and setting up your AWS account correctly.
- Selecting the Best Deployment Strategy: Selecting the best deployment option (Elastic Beanstalk, AWS Amplify, manual EC2 setup, etc.).
- Application Deployment: Deploying your application to AWS.
- Domain and SSL Setup: Setting up your own domain and configuring SSL for HTTPS access.
- Performance Tuning and Monitoring: Performance tuning and monitoring to keep the application healthy.
- Continuous Integration and Continuous Deployment (CI/CD): Creating CI/CD pipelines to automate deployments.
Let’s dive deeper into each of these steps.
Step 1: Initial Next.js Application Setup
Project Creation
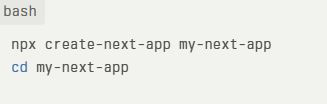
Begin by generating a new Next.js project:
Project Structure Best Practices
Implement a well-defined directory structure to promote code maintainability and scalability. Separate your components, pages, API routes, styles, and utility functions into logical directories for a cleaner UI/UX Design and better developer experience.
Local Development and Testing
Thoroughly test your application locally using:
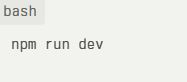
Visit http://localhost:3000 to ensure everything functions correctly before moving to deployment.
Step 2: AWS Account Configuration
AWS Account Creation
If you don’t have one already, create an AWS account at aws.amazon.com.
Understanding the AWS Free Tier
Leverage the AWS Free Tier to experiment and learn without incurring significant costs. Be mindful of the limitations and usage restrictions associated with the Free Tier.
Configuring AWS CLI and Credentials
Set up the AWS Command Line Interface (CLI) and configure your credentials for programmatic access:
- Install the AWS CLI:
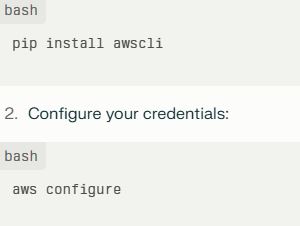
Enter your Access Key ID, Secret Access Key, default region, and output format when prompted. Ensure these credentials are kept secure and not exposed in your codebase.
Setting Up IAM Roles
Create and configure appropriate IAM roles for your AWS resources to follow the principle of least privilege. This ensures that your resources have only the necessary permissions to perform their tasks, enhancing security.
Step 3: Choosing the Optimal Deployment Strategy
Option 1: AWS Elastic Beanstalk (Simplified Deployment)
AWS Elastic Beanstalk simplifies the deployment and management of web applications by automatically handling infrastructure provisioning, OS management, and health monitoring.
Creating an Elastic Beanstalk Environment
- Navigate to the Elastic Beanstalk console in the AWS Management Console.
- Choose Create a new environment.
- Select Web server environment.
- Choose Node.js as the platform.
- Configure the environment settings:
- Instance Type: Choose an appropriate instance type based on your application’s resource requirements.
- Security Groups: Set up security rules to control inbound and outbound traffic as needed.
- Environment Variables: Set environment variables required by your application.
6. Upload your application code as a ZIP file or conn
Option 2: AWS Amplify (Full-Stack Serverless)
AWS Amplify is a comprehensive platform for building and deploying full-stack serverless web and mobile applications. It offers tools and services for authentication, storage, APIs, and hosting.
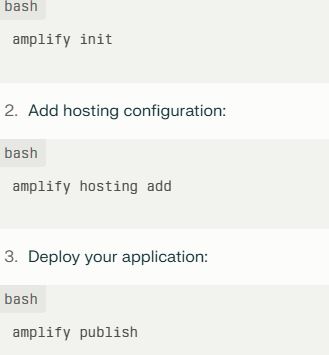
Deploying with AWS Amplify
- Initialize an Amplify project:
Option 3: Manual Setup (EC2, S3, CloudFront – Maximum Control)
For granular control, you can manually configure your deployment using EC2 instances, S3 buckets for static assets, and CloudFront for content delivery.
Option 3: Manual Setup (EC2, S3, CloudFront – Maximum Control)
For granular control, you can manually configure your deployment using EC2 instances, S3 buckets for static assets, and CloudFront for content delivery.
Configure your Next.js application to serve static assets from the S3 bucket. This approach is especially beneficial when combined with Website Screenshot APIs, which can visually track updates across deployment versions and environments.
Detailed Steps for Manual Setup
- Launch an EC2 Instance:
- Launch an EC2 instance with a suitable Linux distribution (e.g., Ubuntu, Amazon Linux 2).
- Install Node.js and necessary dependencies.
2. Configure a Reverse Proxy (Nginx or Apache):
- Set up a reverse proxy to route incoming requests to your Next.js application.
- Configure the proxy to forward requests to the correct port where your Next.js application is running.
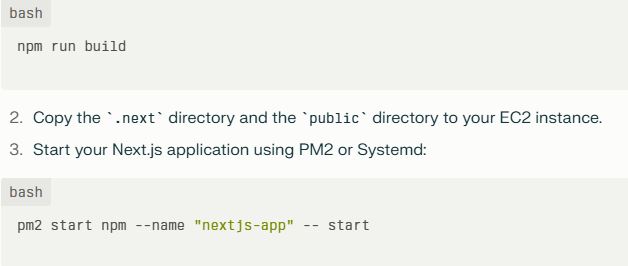
3. Manage Your Application with PM2 or Systemd:
- Use PM2 or Systemd to manage your Next.js application process, ensuring it restarts automatically if it crashes.
4. Set Up S3 for Static Assets:
- Create an S3 bucket to store your static assets (images, fonts, etc.).
- Configure your Next.js application to serve static assets from the S3 bucket.
5. Configure CloudFront for CDN:
- Create a CloudFront distribution to cache and deliver your static assets globally.
- Configure CloudFront to use your S3 bucket as the origin.
Option 4: AWS App Runner
AWS App Runner is a fully managed service designed for easy deployment of containerized web applications and APIs. You can deploy directly from a container image or source code.
Deploying with AWS App Runner
- Containerize Your Application (if needed):

2. Push the Container Image to a Repository (e.g., AWS ECR):
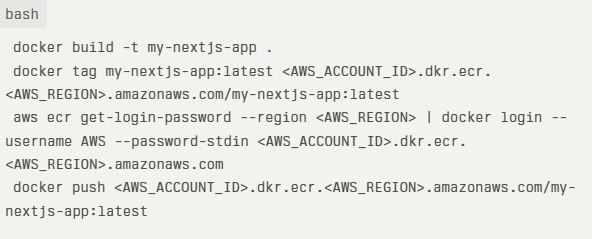
3. Create an App Runner Service:
- In the AWS App Runner console, choose Create Service.
- Specify the source as a container image.
- Provide the image URI from ECR.
- Configure the service settings:
- Instance Configuration: Choose an instance size (CPU and memory).
- Networking: Configure networking settings, such as VPC.
- Auto Scaling: Set up auto-scaling based on traffic.
Step 4: Application Deployment
Deploying to Elastic Beanstalk
- In the Elastic Beanstalk environment dashboard, click Upload and Deploy.
- Upload your application’s ZIP file.
- Monitor the deployment process within the AWS Management Console.
Deploying with AWS Amplify
- Run:
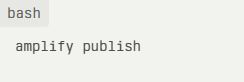
2. Amplify automatically builds and deploys your application to AWS.
Manual Deployment
- Build your Next.js application:
Step 5: Domain and SSL Configuration
Setting Up a Custom Domain with Route 53
1. Register or Transfer Your Domain:
- Register a new domain or transfer an existing one to Route 53.
2. Create a Hosted Zone:
- Create a hosted zone for your domain in Route 53.
3. Configure DNS Records:
- Create DNS records to point to your Elastic Beanstalk environment, Amplify-hosted application, CloudFront distribution, or App Runner service.
Securing Your Application with SSL/TLS Using AWS Certificate Manager (ACM)
1. Request a Certificate:
- Request an SSL/TLS certificate for your domain in AWS Certificate Manager (ACM).
2. Verify Domain Ownership:
- Verify domain ownership by adding DNS records or using email verification.
3. Configure Your Services to Use the Certificate:
- Configure Elastic Beanstalk, CloudFront, Application Load Balancer, or App Runner to use the SSL/TLS certificate.
Step 6: Performance Optimization and Monitoring
Implementing Caching Strategies
- CloudFront Caching: Leverage CloudFront to cache static assets and API responses, significantly reducing latency and improving performance.
- Server-Side Caching: Implement server-side caching using techniques like Redis or Memcached to cache frequently accessed data.
Monitoring with AWS CloudWatch
- Set Up CloudWatch Alarms: Configure CloudWatch alarms to monitor key metrics such as CPU utilization, memory usage, and error rates.
- Log Management: Utilize CloudWatch Logs to collect and analyze logs from your Next.js application and AWS resources.
- Performance Monitoring: Track performance metrics to identify and resolve bottlenecks.
Load Balancing for High Availability
- Application Load Balancer (ALB): Use an ALB to distribute traffic across multiple EC2 instances or containers.
- Auto Scaling Groups: Configure Auto Scaling Groups to automatically adjust the number of EC2 instances based on traffic demand.
Step 7: Continuous Integration and Continuous Deployment (CI/CD)
Setting Up a CI/CD Pipeline
1. Choose a CI/CD Tool:
- Select a CI/CD tool such as AWS CodePipeline, Jenkins, GitLab CI, or CircleCI.
2. Configure the Pipeline:
- Define the pipeline stages (e.g., build, test, deploy).
- Integrate with your source code repository (e.g., GitHub, CodeCommit).
3. Automate the Deployment Process:
- Automate the process of building, testing, and deploying your Next.js application to AWS whenever changes are pushed to your repository.
Example using AWS CodePipeline
1. Create a CodeCommit Repository:
- Create a repository in AWS CodeCommit to store your Next.js application code.
2. Create a CodeBuild Project:
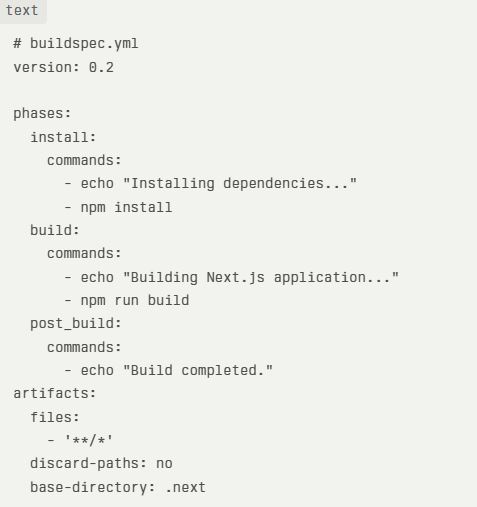
- Create a CodeBuild project to build your Next.js application.
- Define the buildspec.yml file to specify the build commands:
3. Create a CodePipeline Pipeline:
- Create a pipeline in AWS CodePipeline.
- Add a source stage that connects to your CodeCommit repository.
- Add a build stage that uses the CodeBuild project to build your Next.js application.
- Add a deploy stage that deploys the built application to Elastic Beanstalk, S3, or another AWS service.
Troubleshooting Common Issues
Deployment Errors
- Check Logs: Review the logs in CloudWatch or the Elastic Beanstalk console to identify the cause of deployment failures.
- Verify Environment Variables: Ensure that all required environment variables are correctly configured.
- Correct IAM Permissions: Verify that the IAM roles have the necessary permissions.
Performance Bottlenecks
- Monitor Resource Usage: Use CloudWatch to monitor CPU utilization, memory usage, and network traffic.
- Optimize Database Queries: Improve query efficiency to minimize latency and enhance performance.
- Implement Caching: Implement caching strategies to reduce load on your servers.
SSL/TLS Issues
- Verify Certificate Status: Ensure that the SSL/TLS certificate is valid and correctly configured.
- Check DNS Configuration: Ensure that DNS records are correctly pointing to your AWS resources.
Conclusion
Deploying a Next.js application on AWS offers a powerful combination of scalability, reliability, and cost-effectiveness. This exhaustive guide has provided a comprehensive roadmap to help you navigate the deployment process, from initial setup to advanced configurations and continuous deployment strategies. By following these steps and leveraging the rich ecosystem of AWS services, you can confidently deploy and manage your Next.js application at scale.
Also Visit Next.js and Vue.js