The world of web development has evolved rapidly, and full-stack JavaScript development using the MERN stack has emerged as a go-to skill for developers. In this detailed guide, we will explore how to build a full-stack app with the MERN stack for beginners, from setup to deployment.
Whether you’re a student looking to enhance your resume with a beginner MERN stack portfolio project or a working professional transitioning into full-stack development, this step-by-step MERN stack application development tutorial is designed to walk you through every essential phase. If you’re also comparing frameworks, learning how MERN stacks up against Next.js and Vue.js can give deeper insight into choosing the right stack for your needs.
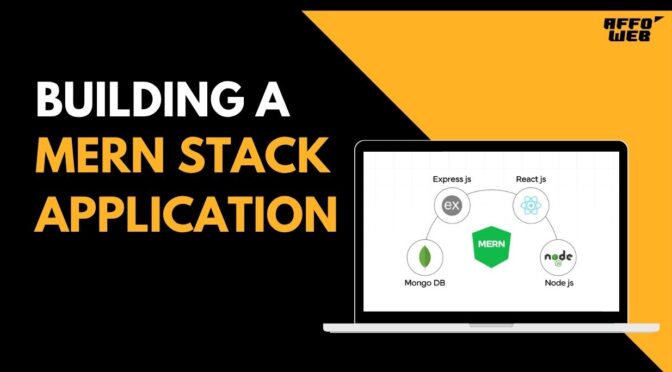
Understanding the MERN Stack Architecture
Before writing a single line of code, it’s important to understand the MERN stack architecture:
- MongoDB – NoSQL document database used to store data in JSON-like format.
- Express.js – A Backend framework for Node.js to build APIs and handle requests.
- React.js – Frontend library to build dynamic user interfaces.
- Node.js – A Runtime environment that allows JavaScript to run on the server.
This architecture enables developers to build scalable, maintainable, and fast full-stack applications using just JavaScript.
Environment Setup for MERN Stack Development
1. Install Development Tools
To get started with the best way to develop a full-stack MERN app from scratch, you need to install the following:
- Node.js & npm – Install from nodejs.org
- MongoDB – Use MongoDB Atlas (cloud) or install locally
- Code Editor – Visual Studio Code recommended
- Postman – For testing RESTful APIs
2. Folder Structure
A professional folder structure ensures maintainability:
/mern-app /client// React frontend /backend// Node/Express backend
Understanding the best folder structure for MERN stack projects at the beginning avoids complications later.
Frontend Development: React Setup and Implementation
React Frontend Setup
Scaffold the React app:
npx create-react-app client cd client npm start
Once started, set up the directory with these subfolders:
/components/pages/context– For state management using Context API
React Components and Routing
Install React Router:
npm install react-router-dom
In App.js:
import{ BrowserRouter as Router, Routes, Route }from 'react-router-dom';import Home from './pages/Home';import Register from './pages/Register';import Login from './pages/Login';function App() { return ( <Router> <Routes><Route path="/" element={<Home />} /><Route path="/register" element={<Register />} /><Route path="/login" element={<Login />} /></Routes> </Router> ); }
Routing is critical in any simple MERN stack app with login and register pages.
Backend Setup: Node.js and Express.js
Backend Initialization
Set up the backend folder:
mkdir backend cd backend npm init -y npm install express mongoose cors dotenv
Basic Express Server
Create server.js:
const express = require('express');const mongoose = require('mongoose');const cors = require('cors');require('dotenv').config();const app = express();app.use(cors());app.use(express.json());mongoose.connect(process.env.MONGO_URI, { useNewUrlParser: true, useUnifiedTopology: true }) .then(() => console.log("MongoDB connected")) .catch(err => console.error(err));app.get("/", (req, res) => res.send("API running"));app.listen(5000, () => console.log("Server started on port 5000"));
Now your backend is ready for routes and database connections.
MongoDB Integration and User Schema
Configure MongoDB with Express Backend
Inside the /models folder, create User.js:
const mongoose = require("mongoose");const UserSchema = new mongoose.Schema({ name: String, email: { type: String, unique: true }, password: String });module.exports = mongoose.model("User", UserSchema);
You now have a data model to perform CRUD operations in MERN.
Creating and Using RESTful APIs
RESTful API with Node and Express
Add route files inside /routes/user.js:
const express = require("express");const router = express.Router();const User = require("../models/User");router.post("/register", async (req, res) => { const newUser = new User(req.body);try { const savedUser = await newUser.save(); res.status(201).json(savedUser); } catch (err) { res.status(500).json(err); } }); module.exports = router;- Include this route in
server.js: const userRoute = require("./routes/user"); app.use("/api/users", userRoute);
Connecting Frontend to Backend
How to Connect Frontend and Backend in MERN Stack App
Install Axios in React:
npm install axios
Then use it to make API calls:
axios.post("http://localhost:5000/api/users/register", { name: "John", email: "john@example.com", password: "123456" });
This shows a react and Node.js integration tutorial in action.
Authentication System
How to Handle Authentication in MERN Stack Project
Install authentication libraries:
npm install bcryptjs jsonwebtoken
User Registration with Hashed Password
const bcrypt = require("bcryptjs"); const hashedPassword = await bcrypt.hash(req.body.password, 10);
Log in with JWT Token
javascript
const jwt = require("jsonwebtoken"); const token = jwt.sign( { id: user._id, email: user.email }, process.env.JWT_SECRET, { expiresIn: "1h" } );- Store the token in localStorage on the client side and validate it in protected routes.
This process forms the core of JWT authentication in MERN stack projects.
Global State Management
MERN Stack State Management with Context API
Create context in /context/AuthContext.js:
javascript
import { createContext, useReducer }from "react"; const INITIAL_STATE = { user: null, };export const AuthContext = createContext(INITIAL_STATE);export const AuthProvider = ({ children }) => { return ( <AuthContext.Provider value={{ user: null }}>{children}</AuthContext.Provider> ); };- Wrap your
<App /> - with
<AuthProvider>for state access throughout the app.
Advanced Features
Real-Time Chat App Using MERN Stack
Use Socket.IO for real-time communication:
bash
npm install socket.io- Implement chat rooms
- Message broadcasting
- Notification systems
This adds dynamic functionality to any real-world MERN stack project.
Deployment Guide
Detailed MERN Stack Full-Stack App Deployment Process
Prepare Production Build for React
bash
cd client npm run build- Serve static files from the backend using Express:
javascript
const path = require("path");
app.use(express.static(path.join(__dirname, "client/build")));
app.get("*", (req, res) => { res.sendFile(path.resolve(__dirname, "client", "build", "index.html")); });
Deploying MERN App to Render or Vercel
- Backend (Node/Express): Deploy on Render
- Frontend (React): Deploy on Vercel
Use GitHub for CI/CD. Set environment variables (like MONGO_URI, JWT_SECRET) in the dashboard.
Deploy your backend to Render and frontend to Vercel. If you’re considering cloud options, you might also explore deploying Next.js to AWS for an alternate scalable solution.
Advantages of Using the MERN Stack
1. Full JavaScript Development
All four technologies—MongoDB, Express.js, React, and Node.js—use JavaScript. This means:
- Seamless data flow between client and server
- No need to switch languages across the stack
- Easier onboarding for new developers
2. Strong Community and Ecosystem
MERN technologies are widely adopted and backed by large communities:
- React is maintained by Meta (formerly Facebook)
- Node.js and Express.js have massive open-source support
- MongoDB offers robust documentation and tools
3. High Performance and Scalability
- Node.js is known for its non-blocking, event-driven architecture
- MongoDB handles large amounts of unstructured data efficiently
Perfect for real-time apps like chat or collaborative tools
4. Reusable Components and Rapid Development
- React promotes component-based development, enhancing reusability
- Speed up development with ready-to-use NPM packages
- Ideal for Agile and MVP product cycles
5. Cloud-Ready and Flexible
- Easily integrate with cloud platforms like AWS, Render, Vercel, and MongoDB Atlas
- Enables horizontal scaling and microservices architecture
Even as frameworks evolve, the MERN stack remains powerful—proof that WordPress is Still Relevant alongside modern stacks when it comes to content management, especially in hybrid setups.
Final Tips and Project Ideas
Learn MERN Stack Development with Real-World Project
Here are project ideas you can try after completing this guide:
- MERN Stack blog platform
- Online bookstore with a payment gateway
- Expense tracker
- Social media clone
- Real-time collaborative editor
Each helps reinforce the concepts of MongoDB database integration, Express backend, React frontend, and Node.js APIs.
Conclusion
In this guide, we covered:
- Setting up a MERN environment
- Backend development with Node.js and Express
- Frontend development with React
- MongoDB database integration
- CRUD operations in MERN
- JWT authentication
- MERN stack state management with Context API
- Deployment to Render/Vercel
By following this step-by-step MERN stack application development tutorial, you now know the best way to develop a full-stack MERN app from scratch. You can apply this knowledge to build scalable, secure, and real-time applications in the real world.
Continue your journey by exploring testing tools, GraphQL, or even extending your MERN app into a mobile app using React Native.